
The author would like to thank Estudio Bitcoin, and personally Albercoin and Arkad, for their work on installing RoninDojo on x86.
Installation of “vanilla” Dojo is described in official documentation by Samourai and in guide by 𝕂𝕐ℂ𝟛.
During the arrest of the Samourai Wallet developers on April 24, 2024, the Whirlpool coordinator’s servers and the OXT blockchain explorer were also shut down by intelligence agencies. Therefore, starting with RoninDojo v2.1.4, the Whirlpool tools, WST and Boltzmann calculator have been removed from the code.
As a result of the attack on testnet, the Testnet3 version becomes inoperable, and the new Testnet4 has not yet been implemented in Samourai Dojo.
Dojo and RoninDojo differences #
Classic Dojo server includes:
- Bitcoin Core.
- BTC RPC Explorer.
- Fulcrum Indexer (ElectrumX compatible) or Addrindexrs.
- Dojo Maintenance Tool (DMT).
- Whirlpool CLI.
- Testnet support (not available in RoninDojo).
RoninDojo adds:
- Electrum Rust Server (electrs). Thus, the user can choose from three options.
- Optional Mempool blockchain explorer.
- Ronin UI web interface.
- Whirlpool GUI directly in the web interface.
- Ronin CLI (command line interface).
- Whirlpool Stats Tool (WST).
- Boltzmann Calculator.
- Backing up the blockchain data to a separate disk after IBD.
This tutorial will describe how to manually install all components in a Debian based operating system. I used Ubuntu 22.04. This method will allow you to:
- Use any hardware that meets the minimum requirements. Two SSDs are recommended, but not required.
- Choose a basic operating system.
- Configure the necessary components before installing the system:
- Select a blockchain indexer (Electrs, Fulcrum or Addrindexrs).
- Install Mempool explorer.
- Enable Auth47 for authentication to DMT using PayNym.
- Configure Tor bridges.
- Enable Testnet support.
If you are only learning the features of Samourai Wallet, I recommend you to try all the functions in Testnet. All you need is a virtual machine and 100 GB of free disk space.
System Requirements #
- 64-bit computer with Intel/AMD processor. Intel Core i5 6500 or similar is recommended.
- Minimum 8GB of RAM.
- 1TB SSD, 2TB is highly recommended. It is also a good practice to use a small SSD of 100 GB or more to run the operating system while the blockchain data is stored on a separate large disk.
- An external 1TB HDD/SSD drive is recommended for backing up blockchain data from Bitcoin Core.
OS installation #
You need to install the base operating system. I used Ubuntu 22.04 Server. It can be downloaded from Ubuntu website.
During the installation process, the “Set up this disk as an LVM group” option must be turned off.
If you are using two SSDs, choose the smaller drive.

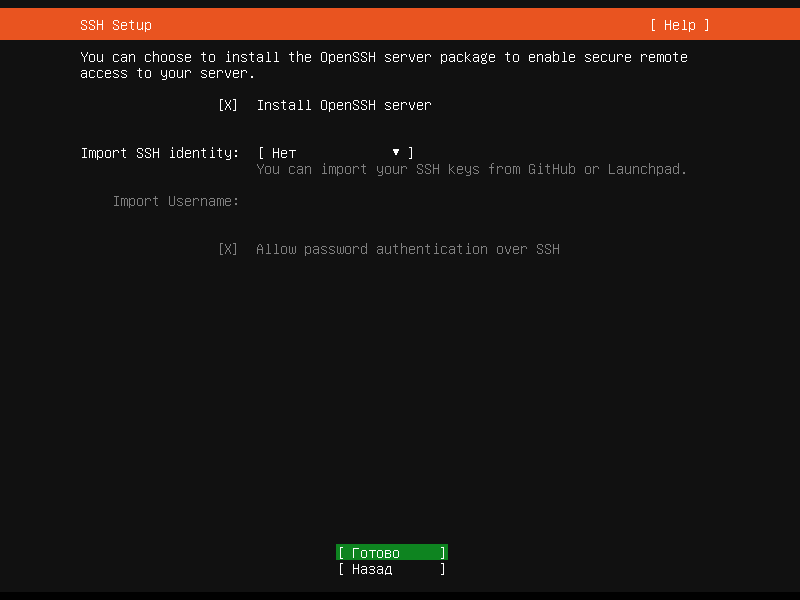
Don’t forget to enable the “Install OpenSSH server” option.
After successful installation, log into your server via local network using an SSH client with the username you set during installation, your RoninDojo machine’s internal IP address, and port 22. You can figure out the address in local network by using the command on the server:
hostname -I
My internal IP address is 10.0.2.15, respectively the subnet address in my case is 10.0.2.0/24, by analogy define yours and write it down.
Defining the configuration #
Find the name of your network interface. Write it down, for example “eno1”.
ip -o -4 route show to default | awk '{print $5}'
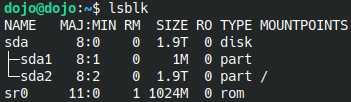
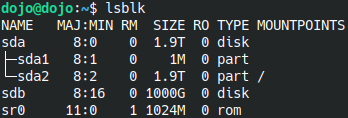
Enter the following command and write down the name of partition (from the “NAME” column), where the root “/” of the file system is located (“MOUNTPOINTS” column). Add “/dev/” before the partition name. Mine is “/dev/sda2”.
lsblk
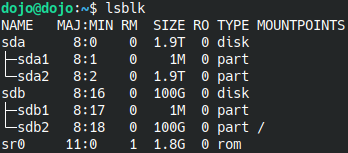
If you are using two SSDs, determine from the output of the previous command the name of the disk that will be used for blockchain data. Its capacity will be either 1 or 2 TB. In the example below, the system partition is /dev/sdb2 and the large disk is /dev/sda.
Format the large disk. Replace the value of /dev/sda with your own. Don’t forget the “1” at the end of the third command.
sudo wipefs -a --force /dev/sda
sudo sgdisk -Zo -n 1 -t 1:8300 /dev/sda
sudo mkfs.ext4 -q -F -L "main" /dev/sda1
lsblk
Now I have a large partition /dev/sda1, the only one on this disk. Write down the name of your partition to host the blockchain data.
Mount the partition. Replace /dev/sda1 with your value.
sudo tee "/etc/systemd/system/mnt-usb.mount" <<EOF
[Unit]
Description=Mount primary storage /dev/sda1

[Mount]
What=/dev/disk/by-uuid/$(lsblk -no UUID /dev/sda1)
Where=/mnt/usb
Type=$(blkid -o value -s TYPE /dev/sda1)
Options=defaults

[Install]
WantedBy=multi-user.target
EOF
sudo systemctl daemon-reload sudo systemctl start mnt-usb.mount sudo systemctl enable mnt-usb.mount
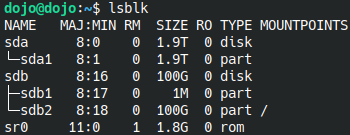
Plug in the external HDD/SSD that you plan to use for backup of the blockchain data. You can skip this step. Connect the drive and run the following command again:
lsblk
You will see the newly connected disk in the table. Write down the name of the disk for backups by adding “/dev/” at the beginning and “1” at the end, in my case it is /dev/sdb1.
Pre-installation #
Let’s add user ronindojo to our system, set a password and log in as the new user.
sudo useradd -s /bin/bash -d /home/ronindojo -m -G sudo ronindojo
sudo passwd ronindojo
sudo su
echo "ronindojo    ALL=(ALL) ALL" >> /etc/sudoers
su - ronindojo
Install the required programs.
sudo apt update && sudo apt upgrade
sudo apt install bash-completion nano tor obfs4proxy torsocks net-tools apt-transport-https gnupg-agent unzip git openjdk-11-jdk fail2ban net-tools htop unzip ufw rsync jq python3-pip gcc dialog bpytop less plymouth-label --no-install-recommends
pip3 install pipenv
Docker installation.
curl -fsSL https://download.docker.com/linux/ubuntu/gpg | sudo apt-key add -
sudo add-apt-repository "deb [arch=amd64] https://download.docker.com/linux/ubuntu $(lsb_release -cs) stable"
sudo apt install docker-ce docker-ce-cli containerd.io docker-buildx-plugin docker-compose-plugin --no-install-recommends
sudo curl -L https://github.com/docker/compose/releases/download/v2.21.0/docker-compose-linux-x86_64 -o /usr/bin/docker-compose
sudo chmod +x /usr/bin/docker-compose
sudo systemctl stop docker
sudo systemctl stop docker.socket
sudo systemctl stop containerd
sudo mkdir -p /mnt/usb
sudo mv /var/lib/docker/ /mnt/usb/
sudo tee "/etc/docker/daemon.json" << EOF
{
  "log-driver": "json-file",
  "log-opts": {
    "max-size": "10m",
    "max-file": "3"
  },
  "data-root": "/mnt/usb/docker"
}
EOF
sudo systemctl start docker
sudo usermod -a -G docker ronindojo
NodeJS installation.
curl -fsSL https://deb.nodesource.com/setup_16.x | sudo -E bash
sudo apt install nodejs
exit
Installing and configuring the Tor service #
sudo useradd -c "tor" tor
sudo tee "/usr/lib/systemd/system/tor.service" <<EOF
[Unit]
Description=Anonymizing overlay network for TCP
After=syslog.target network.target nss-lookup.target

[Unit]
RequiresMountsFor=/mnt/usb

[Service]
Type=notify
NotifyAccess=all
ExecStartPre=/usr/bin/tor -f /etc/tor/torrc --verify-config
ExecStart=/usr/bin/tor -f /etc/tor/torrc
ExecReload=/bin/kill -HUP ${MAINPID}
KillSignal=SIGINT
TimeoutSec=60
Restart=on-failure
WatchdogSec=1m
LimitNOFILE=32768

# Hardening
PrivateTmp=yes
PrivateDevices=yes
ProtectHome=yes
ProtectSystem=full
ReadOnlyDirectories=/
ReadWriteDirectories=-/var/lib/tor /mnt/usb/tor
ReadWriteDirectories=-/var/log/tor
NoNewPrivileges=yes
CapabilityBoundingSet=CAP_SETUID CAP_SETGID CAP_NET_BIND_SERVICE CAP_DAC_READ_SEARCH

[Install]
WantedBy=multi-user.target
EOF
sudo nano /etc/tor/torrc
Paste the following lines at the end of the file. If you are having trouble connecting to Tor, set UseBridges 1 and add bridges after Bridge:
ClientTransportPlugin obfs4 exec /usr/bin/obfs4proxy
UseBridges 1
Bridge obfs4 ... iat-mode=0
Bridge obfs4 ... iat-mode=0
Bridge obfs4 ... iat-mode=0
#Hidden Service Ronin UI
User tor
DataDirectory /mnt/usb/tor
HiddenServiceDir /mnt/usb/tor/hidden_service_ronin_backend/
HiddenServiceVersion 3
HiddenServicePort 80 127.0.0.1:8470
sudo systemctl daemon-reload
sudo systemctl restart tor
sudo journalctl -f -u tor
Wait for the “Bootstrapped 100% (done)” message to appear in the Tor log, and close it with Ctrl+C.
Samourai Dojo installation #
cd
torsocks wget http://2l2o5umijiwxjioxwpsvwxe6pr75tj7r5rggnl5ze256guwvtee3kpqd.onion/Ronin/dojo/archive/master.tar.gz -O dojo-master.tar.gz
tar -xvf dojo-master.tar.gz
rm dojo-master.tar.gz
cd ~/dojo/docker/my-dojo/
Generate random password.
tr -dc 'a-zA-Z0-9' </dev/urandom | head -c'32'
nano conf/docker-bitcoind.conf.tpl
Insert generated password after BITCOIND_RPC_PASSWORD=
You can save the file and exit the editor by pressing Ctrl+X, y, Enter.
nano conf/docker-indexer.conf.tpl
Here you can replace electrs (default) with fulcrum or addrindexrs in INDEXER_TYPE=. Fulcrum takes much longer to synchronize than Electrs and is recommended for “heavy” wallets with a large number of transactions. Addrindexrs only supports Samourai Wallet, while the other two can be used to connect wallets such as Electrum and Sparrow Wallet.
tr -dc 'a-zA-Z0-9' </dev/urandom | head -c'32'
tr -dc 'a-zA-Z0-9' </dev/urandom | head -c'32'
nano conf/docker-mempool.conf.tpl
Mempool browser installation can be enabled by the MEMPOOL_INSTALL=on option. Passwords must be inserted after MEMPOOL_MYSQL_PASS= and MEMPOOL_MYSQL_ROOT_PASSWORD=.
tr -dc 'a-zA-Z0-9' </dev/urandom | head -c'32'
tr -dc 'a-zA-Z0-9' </dev/urandom | head -c'32'
nano conf/docker-mysql.conf.tpl
Add the generated passwords after MYSQL_ROOT_PASSWORD= and MYSQL_PASSWORD=.
tr -dc 'a-zA-Z0-9' </dev/urandom | head -c'32'
tr -dc 'a-zA-Z0-9' </dev/urandom | head -c'32'
tr -dc 'a-zA-Z0-9' </dev/urandom | head -c'32'
nano conf/docker-node.conf.tpl
Insert passwords after NODE_API_KEY=, NODE_ADMIN_KEY= and NODE_JWT_SECRET=. Optionally add your BIP47 payment code (PM8T…) after NODE_PAYMENT_CODE=. By enabling this feature, you will be able to authenticate to the Dojo Maintenance Tool using the “Authenticate using PayNym” option from the Tools menu in Samourai Wallet by simply scanning the QR code on the login screen.
nano conf/docker-tor.conf.tpl
If you have trouble connecting to Tor, set TOR_USE_BRIDGES=on and add bridges as follows (don’t forget the double quotes): TOR_BRIDGE_1=“obfs4 … iat-mode=0”.
For Testnet only
nano conf/docker-common.conf.tplSet COMMON_BTC_NETWORK=testnet.
nano nginx/testnet.confAdd the following lines to the section # Site Configuration:
    # Proxy WebSocket connections first
    location /v2/inv {
        proxy_pass http://websocket;
        proxy_http_version 1.1;
        proxy_set_header Upgrade $http_upgrade;
        proxy_set_header Connection $connection_upgrade;
    }
    # PushTX server is separate, so proxy first
    location /v2/pushtx/ {
        proxy_pass http://node:8081/;
    }
    # Tracker server is separate, so proxy first
    location /v2/tracker/ {
        proxy_pass http://node:8082/;
    }
    # Proxy all other v2 requests to the accounts server
    location /v2/ {
        proxy_pass http://node:8080/;
    }
./dojo.sh install
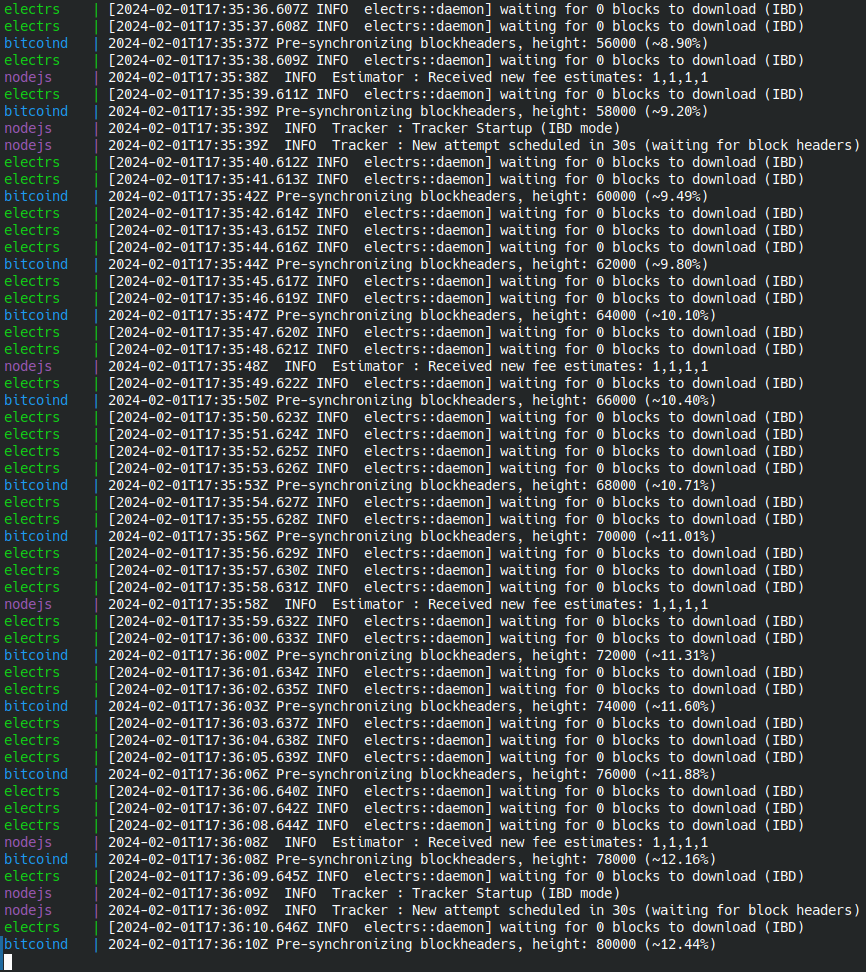
Wait for the Dojo installation to complete. It takes 10 to 30 minutes, depending on the performance of your computer and network connection.
If errors occur, usually related to network connectivity, you can stop the installation script with a few presses of the Ctrl+C and repeat the last command. If the installation still fails, you will have to configure a VPN on your router. Unfortunately, this procedure is beyond the scope of this guide.
RoninOS #
RoninOS is essentially a script that modifies the base operating system for RoninDojo to function properly. Since it is written for a specific OS and a specific hardware configuration, I made all the necessary changes manually.
cd
torsocks wget http://2l2o5umijiwxjioxwpsvwxe6pr75tj7r5rggnl5ze256guwvtee3kpqd.onion/Ronin/RoninOS/archive/master.tar.gz -O roninos-master.tar.gz
tar -xvf roninos-master.tar.gz
mv roninos RoninOS
rm roninos-master.tar.gz
Customizing plymouth #
After that, the RoninDojo logo will be displayed when the system boots, nothing special but a nice touch.

sudo mkdir -p /etc/plymouth
sudo cp ~/RoninOS/overlays/RoninOS/etc/plymouth/plymouthd.conf /etc/plymouth/
sudo cp -r ~/RoninOS/overlays/RoninOS/usr/share/plymouth/themes/ronindojo/ /usr/share/plymouth/themes/
sudo nano /etc/default/grub
Change the GRUB_CMDLINE_LINUX_DEFAULT line as follows:
GRUB_CMDLINE_LINUX_DEFAULT="quiet splash"
sudo update-alternatives --install /usr/share/plymouth/themes/default.plymouth default.plymouth /usr/share/plymouth/themes/ronindojo 120
sudo update-grub
sudo update-initramfs -u
Configuring the firewall #
sudo ufw default deny incoming
sudo ufw default allow outgoing
In the following commands, use your subnet address that we defined at the end of the OS installation.
sudo ufw allow from 10.0.2.0/24 to any port "80"
sudo ufw allow from 10.0.2.0/24 to any port "22"
sudo ufw allow from 10.0.2.0/24 to any port "50002"
sudo ufw enable
Disk configuration #
mkdir -p ~/.config/RoninDojo/data/
touch ~/.config/RoninDojo/data/system-install
In the following command, use your system primary partition name or the name of the blockchain data partition if you are using a two SSDs configuration, which you wrote down when defining the configuration. As a reminder, I have one disk and a primary partition /dev/sda2.
echo "blockdata_storage_partition=/dev/sda2" > ~/.config/RoninDojo/data/blockdata_storage_partition
In the following command, use your partition name for the blockchain backup if you are going to use this feature. Mine is /dev/sdb1.
echo "backup_storage_partition=/dev/sdb1" > ~/.config/RoninDojo/data/backup_storage_partition
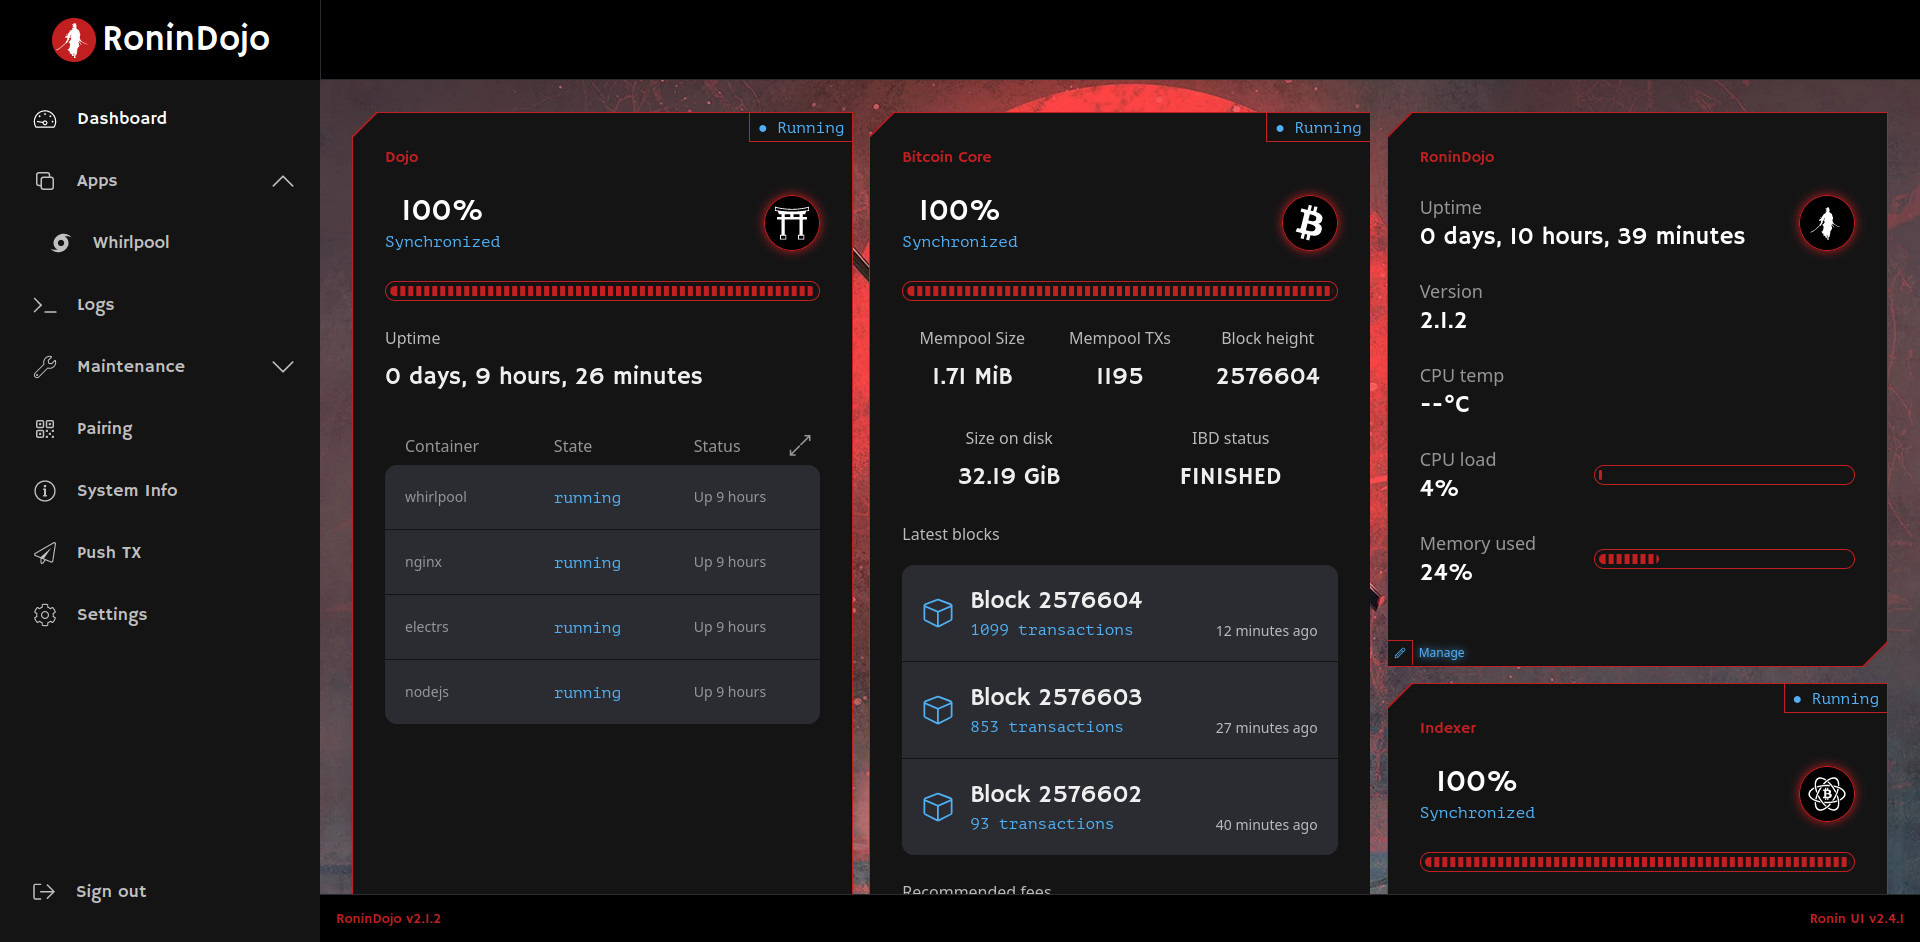
Ronin UI and Ronin CLI #
Ronin UI is a great web interface for monitoring and administering your node with a built-in Whirlpool GUI. Using it, you do not need to pair with a Whirlpool GUI application on another computer.
Ronin CLI is a console interface accessible via SSH or directly on the server, with advanced features for managing your node, security settings, and additional utilities.
cd
mkdir ~/Ronin-UI
sudo mkdir -p /usr/share/nginx/logs/
sudo bash -c "cat /mnt/usb/tor/hidden_service_ronin_backend/hostname > /home/ronindojo/.config/RoninDojo/data/ronin-ui-tor-hostname"
torsocks wget http://2l2o5umijiwxjioxwpsvwxe6pr75tj7r5rggnl5ze256guwvtee3kpqd.onion/Ronin/ronindojo/archive/master.tar.gz -O ronindojo-master.tar.gz
tar -xvf ronindojo-master.tar.gz
mv ronindojo RoninDojo
rm ronindojo-master.tar.gz
sudo ln -sf /home/ronindojo/RoninDojo/ronin /usr/local/bin/ronin
cp ~/RoninDojo/user.conf.example ~/.config/RoninDojo/user.conf
nano ~/.bashrc
Add two lines to the end of the file:
/home/ronindojo/RoninDojo/Scripts/.logo
ronin
source ~/.bashrc
Congratulations, you’re now in the Ronin CLI.
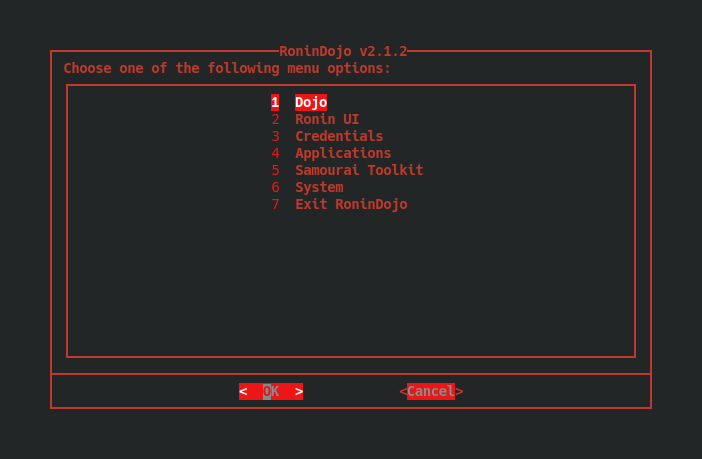
Go to the menu:
Ronin UI > Re-install
When the installation is complete, press any key and exit Ronin UI:
Go Back > Exit RoninDojo
To enter the Ronin CLI again, you can use the command:
ronin
Additionally, you will be automatically redirected to the Ronin CLI when logging in as ronindojo user.
Ronin UI is now accessible from your local network where the RoninDojo machine is located, via a web browser at http://ronindojo.local or by IP address of the server, in my case http://10.0.2.15.
The login password is your ronindojo user password.

Ronin CLI patches #
The installation is complete, but requires some fixing of the Ronin CLI scripts to work correctly.
In the following command, use the name of your network interface that we defined earlier. Mine is enp0s3.
sed -i 's/eth0/enp0s3/g' ~/RoninDojo/Scripts/Menu/menu-system-monitoring.sh
sed -i 's/findmnt \"\${install_dir}\"/findmnt -n -o SOURCE --target \"\${install_dir}\"/g' ~/RoninDojo/Scripts/functions.sh
sed -i 's/findmnt \"\${install_dir}\"/findmnt -n -o SOURCE --target \"\${install_dir}\"/g' ~/RoninDojo/Scripts/Install/install-dojo.sh
For Testnet only
sed -i 's/_data/_data\/testnet3/g' ~/RoninDojo/Scripts/Install/install-send-block-data.sh
sed -i 's/_data/_data\/testnet3/g' ~/RoninDojo/Scripts/Install/install-receive-block-data.sh
sed -i 's/ludwig.py --rpc/ludwig.py --testnet --rpc/g' ~/RoninDojo/Scripts/Menu/menu-boltzmann.sh
RoninDojo tools #
Blockchain data backup #
I recommend testing this before fully downloading the blockchain, as misconfiguring the disks can lead to data loss and you will have to start from scratch. Perform the test when the first Bitcoin Core synchronization percentages appear in the web interface.
Plug in an external disk for backup. In the Ronin CLI, go to the menu:
System > Disk Storage > Format & Mount New Backup Drive
After formatting the disk, move from the main menu:
Dojo > Next Page > Send Block Data to Backup
After copying, restore the backup from the menu:
Dojo > Next Page > Receive Block Data from Backup
Installing WST and Boltzmann Calculator #
To install and use these utilities, simply select the corresponding item from the menu:
Samourai Toolkit
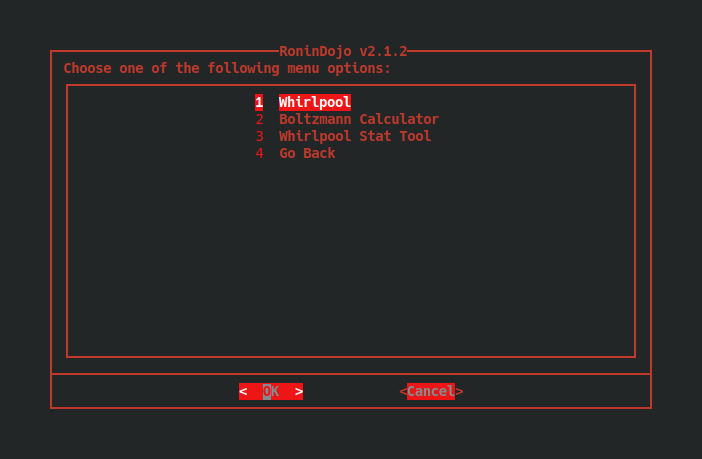
The WST utility is not available for Testnet.
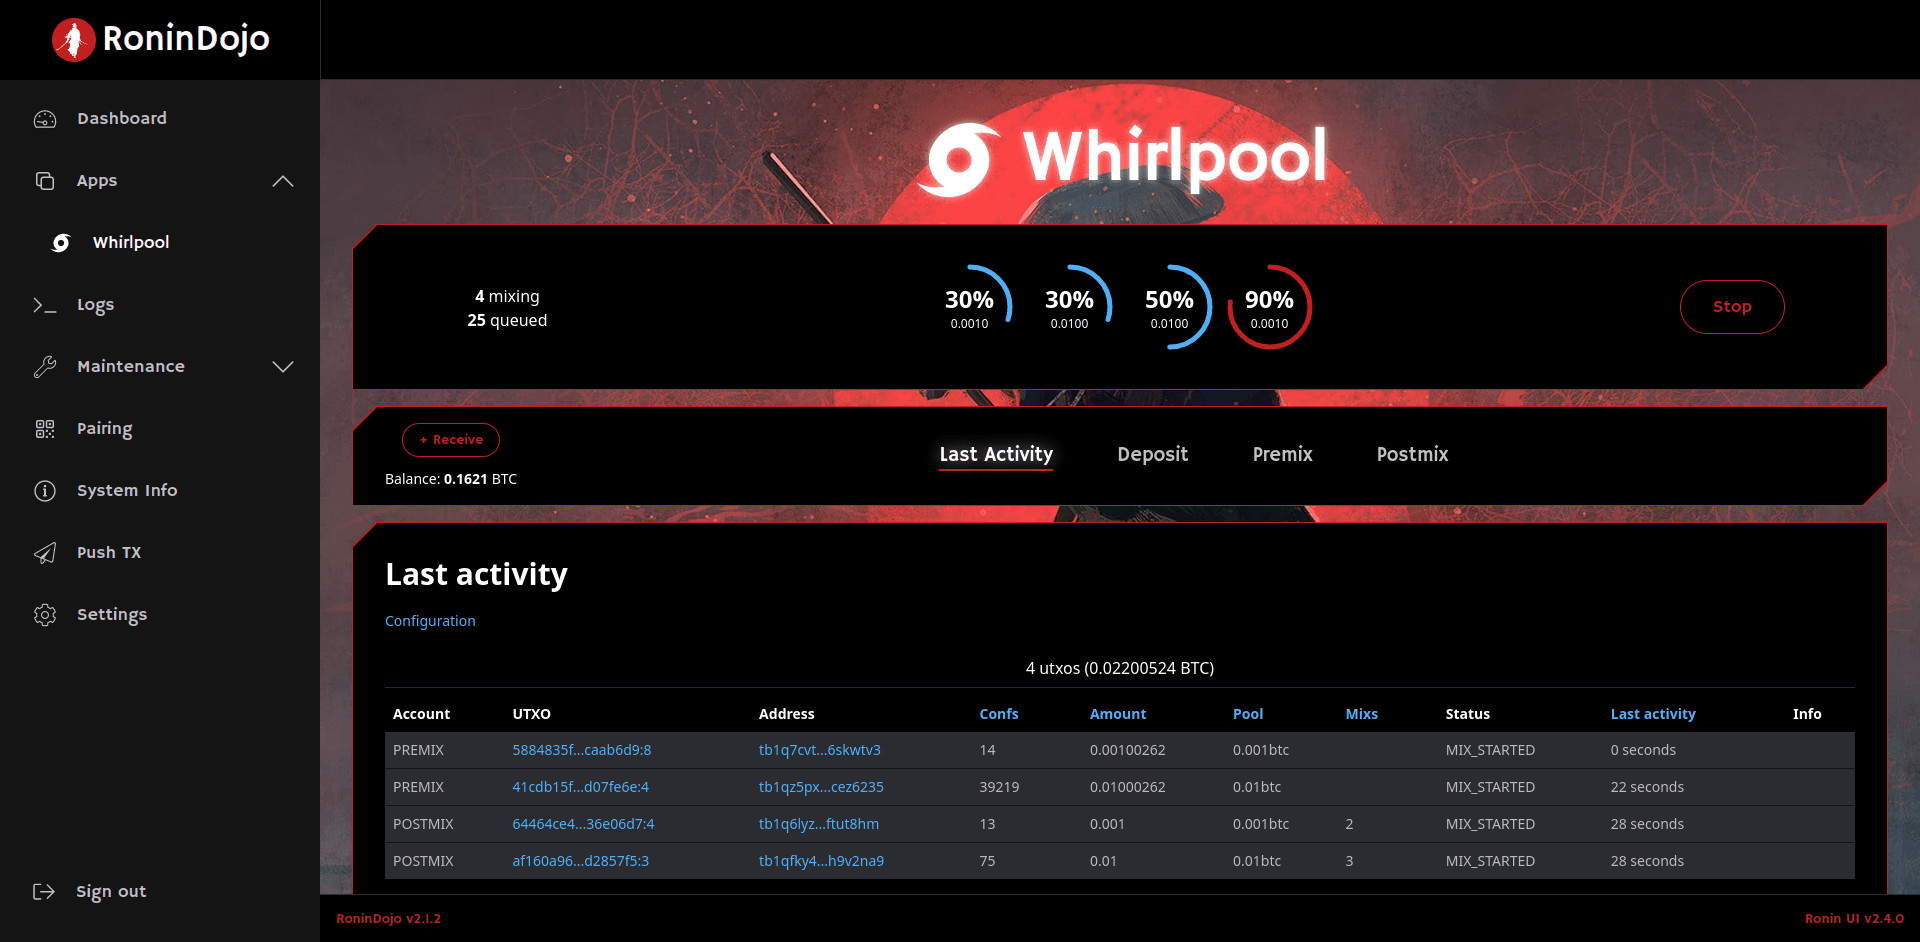
Whirlpool #
Wait for full synchronization of Bitcoin Core, Dojo and Indexer.
Go to the “Pairing” menu and pair Samourai Wallet with Samourai Dojo. You can only connect to Dojo when the wallet is freshly installed.
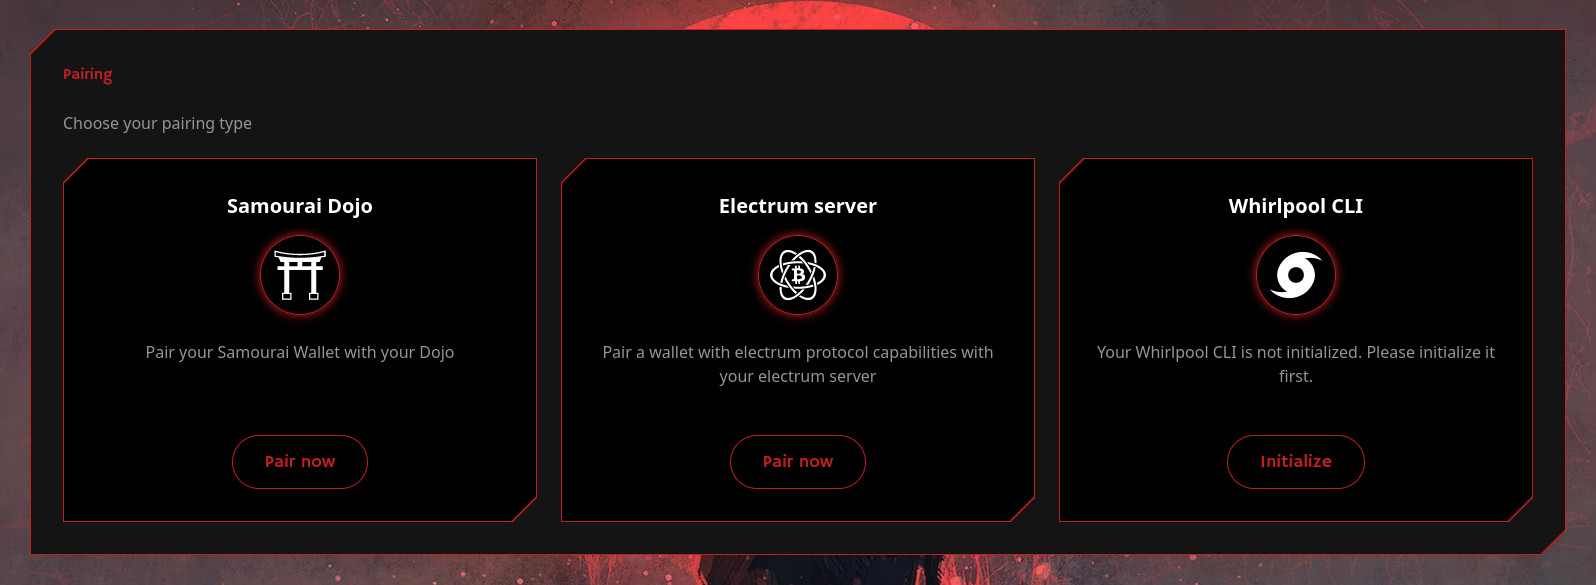
Click “Pair now” under “Samourai Dojo”, scan the Dojo pairing QR code in your Samourai Wallet.
Go to the wallet Settings menu and:
Transactions > Pair to Whirlpool GUI
Transfer the resulting Whirlpool GUI pairing code to your computer.
Under Whirlpool CLI, click “Initialize” and use your pairing code.
After successful pairing, you need to click the “Log in” button and enter the passphrase you used when creating the wallet.

Finally, you can enter the Whirlpool interface and remix UTXO 24/7 while your node is running.
Blockchain explorers #
To access the BTC RPC Explorer, go to “Dashboard” and click “Manage” under “Dojo”.
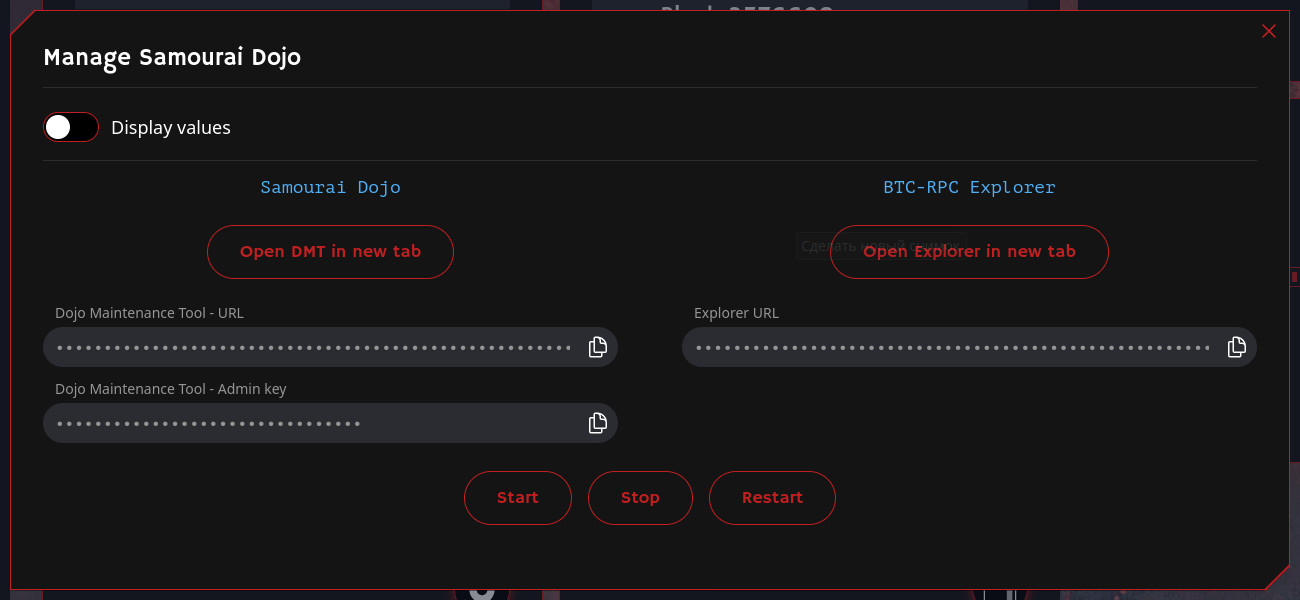
Here eou can find links to access the explorer and the Dojo Maintenance Tool (DMT) through a Tor browser.
A link to access the Mempool explorer is also available from the “Manage” menu in the corresponding section of the Dashboard. There you can also install or uninstall Mempool.
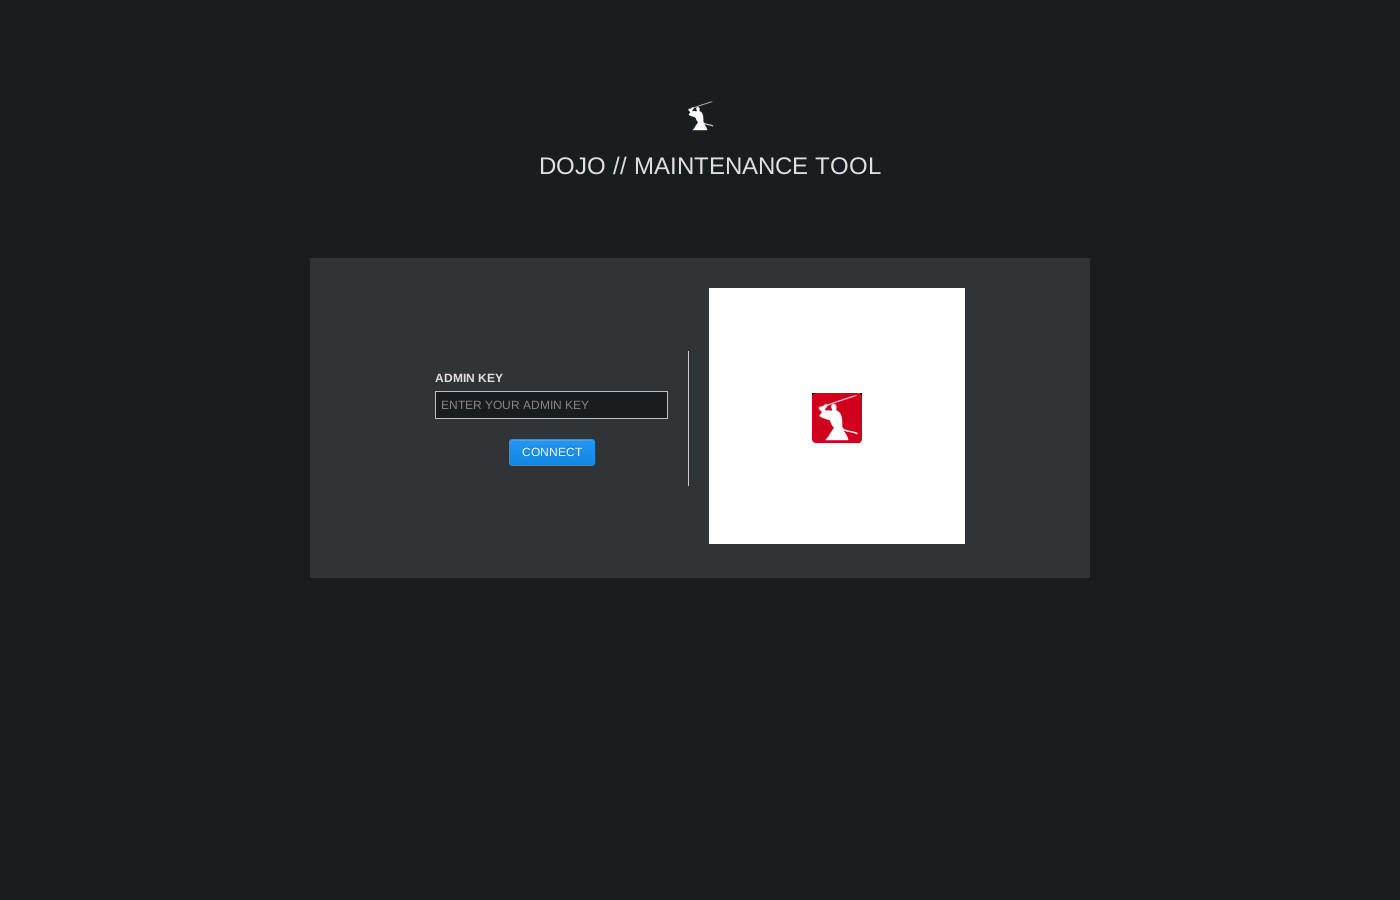
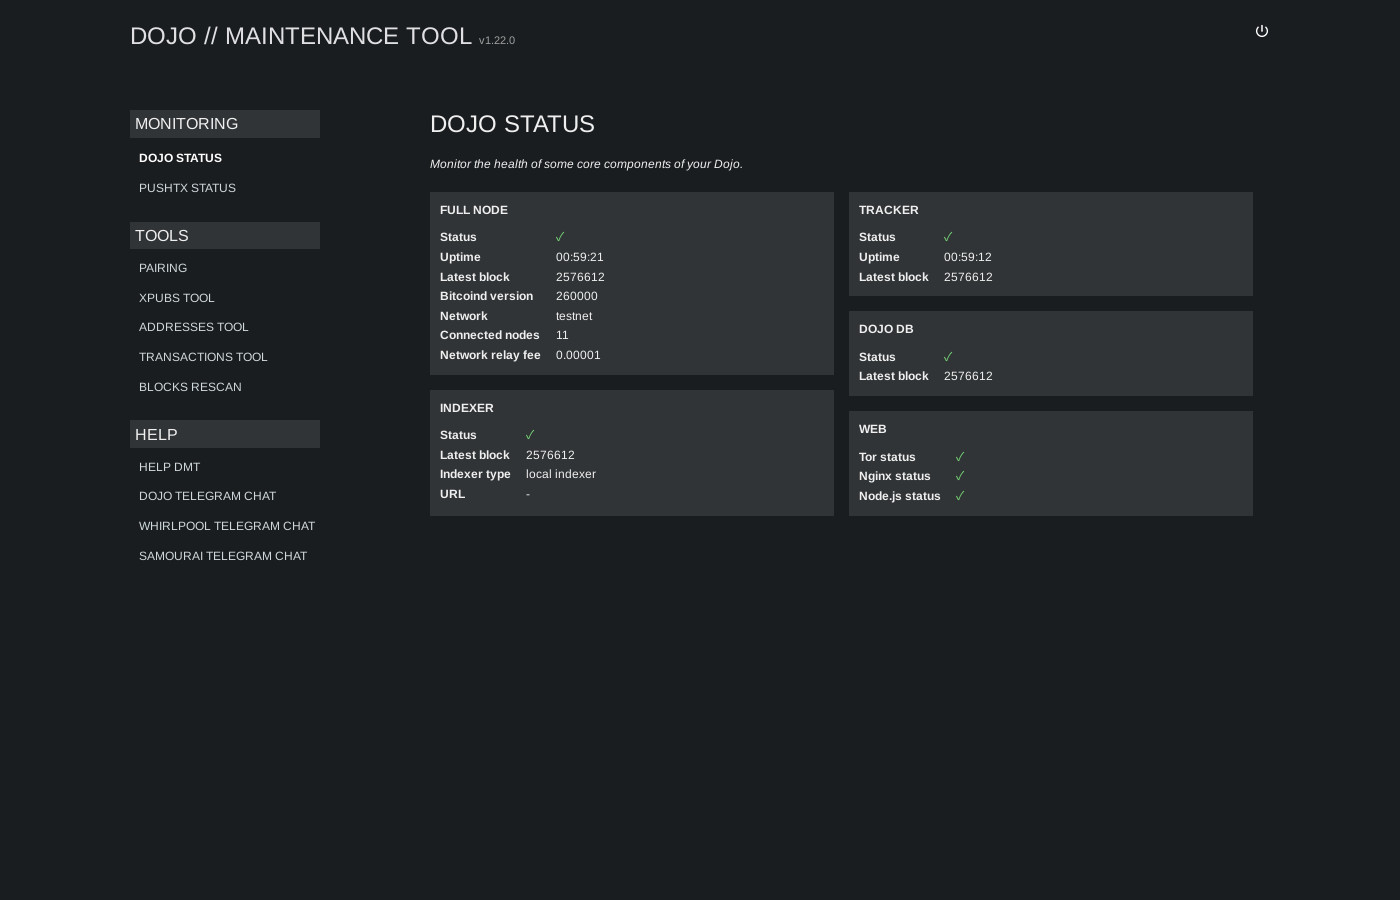
Dojo Maintenance Tool (DMT) #
DMT is a simplified node monitoring dashboard with basic features for tracking your XPUBs, addresses and transactions – similar to the “Maintenance” menu in Ronin UI. In the face of poor Tor connection quality, it can be a useful tool. If you added your PayNym in the docker-node.conf.tpl file when installing Samourai Dojo, a QR code will be available to you. Simply select “Authenticate using PayNym” from the “Tools” menu in Samourai Wallet and scan it to access DMT.
If you didn’t enable PayNym authentication (Auth47) during installation, add the BIP47 payment code after NODE_PAYMENT_CODE= to the file:
nano ~/dojo/docker/my-dojo/conf/docker-node.confAfter that, restart Dojo from the “Manage” menu in the corresponding section of the Ronin UI using the “Restart” button.
Blockchain Indexers #
As mentioned above, you can choose between Electrs, Fulcrum or Addrindexrs. You can install another indexer from the “Dashboard” via the “Manage” menu under “Indexer”.
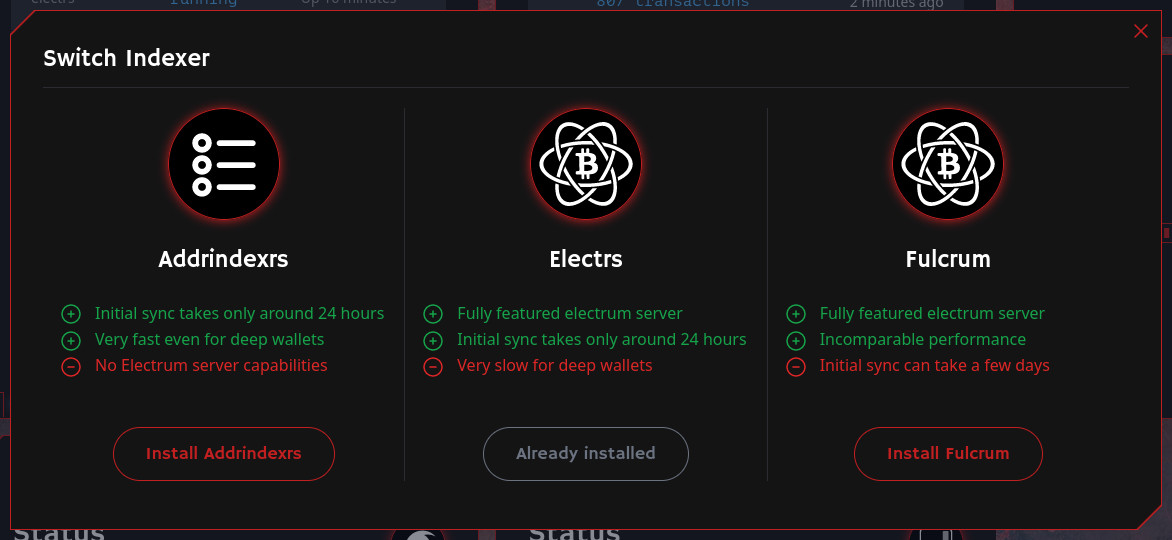
Note that if you select a different indexer, the data of the previous one is not saved. If you decide to switch back, the indexer synchronization will start from scratch.
The link to connect Sparrow or Electrum wallets to your indexer via Tor is in the “Pair” menu under “Electrum server”.
Further tools #
Push TX in Ronin UI will allow you to broadcast a signed transaction to the blockchain using your node.
Credentials in the Ronin CLI will display links to all the services on your node that are accessible via Tor.
Security settings can be found in the Ronin CLI menu:
System > Next Page
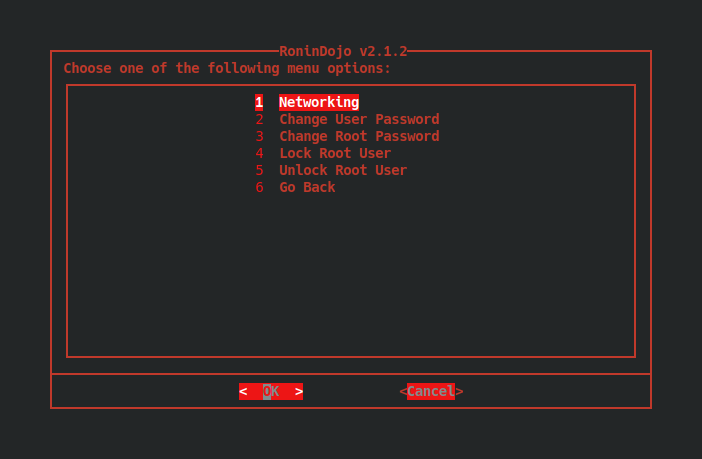
Here you can manage firewall settings, SSH settings, change the password of the ronindojo user as well as root.
RoninDojo update #
Ronin UI update #
Ronin UI is updated in one click. If update is available, you will see a notification about the new version in the web interface.
The second option is via console:
cd
rm -rf Ronin-UI/
ronin
Next, navigate to the menu:
Ronin UI > Re-install
Ronin CLI update #
The standard RoninDojo update script can break the system, so update it manually.
cd
rm -rf ~/RoninDojo/
torsocks wget http://2l2o5umijiwxjioxwpsvwxe6pr75tj7r5rggnl5ze256guwvtee3kpqd.onion/Ronin/ronindojo/archive/master.tar.gz -O ronindojo-master.tar.gz
tar -xvf ronindojo-master.tar.gz
mv ronindojo RoninDojo
rm ronindojo-master.tar.gz
Apply patches from this section.
Samourai Dojo update #
cd
mkdir temp
mv dojo/docker/my-dojo/conf/ temp/
rm -rf dojo/
torsocks wget http://2l2o5umijiwxjioxwpsvwxe6pr75tj7r5rggnl5ze256guwvtee3kpqd.onion/Ronin/dojo/archive/master.tar.gz -O dojo-master.tar.gz
tar -xvf dojo-master.tar.gz
rm dojo-master.tar.gz
cp ~/temp/conf/* ~/dojo/docker/my-dojo/conf/
rm -rf temp/
cd ~/dojo/docker/my-dojo/
Making the necessary changes for Testnet from this section.
./dojo.sh upgrade